

.svg)

.svg)

.svg)


-2.svg)


Let’s take a look at an example of how you might use folders functionality from end to end on a creative project.
Imagine I’m the client principal for Cheetah Creative, an agency specialising in brand, design and digital strategy.
Below is an example of a new quote I have created for a ‘strategy and brand project’ including a brochure redesign and business cards for my client Busy Bees.
To start off the quote, I am going to use some job templates that I’ve previously created that really speed up and simplify the quote creation for work I regularly do. I am using a “strategy and branding” project template that pulls in the standard tasks and costs that normally go into a project like this. Then I also applied two more additional templates for “brochures” and “business cards”. Using job templates has enabled me to literally create the structure of the new quote within two minutes and three clicks of a button. You can see each template has created a folder for each phase of work that my team and I need to do.
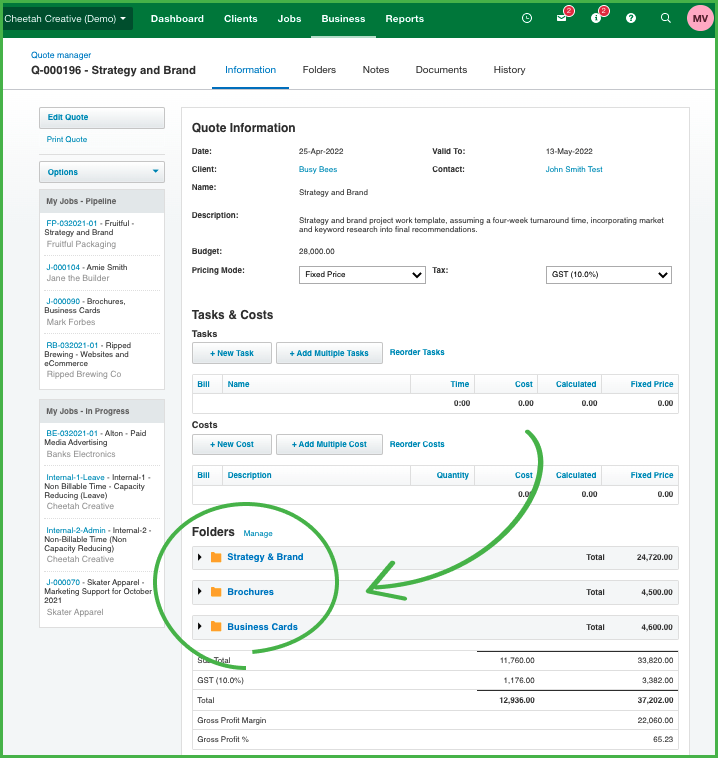
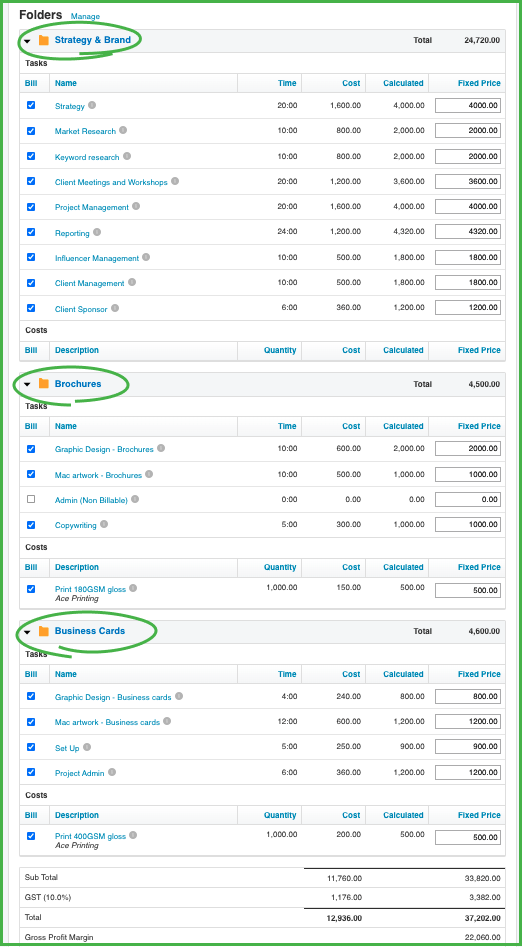
I can expand out each folder to very clearly see all of the tasks and costs associated with completing each element of the project. I can also see the totals of each phase of the project, plus the grand total, gross profit amount and the profit percentage that we expect to make from this work.
I’ve also switched from “Calculated” to “Fixed price” pricing mode, which will give me more flexibility for invoicing later on.
Next, I’ll print the quote and choose another custom print template to apply. I’ve customised several different options depending on the level of detail I want to share with my clients. These have been designed with my own brand Cheetah Creative and are super professional with a standardised look and feel.
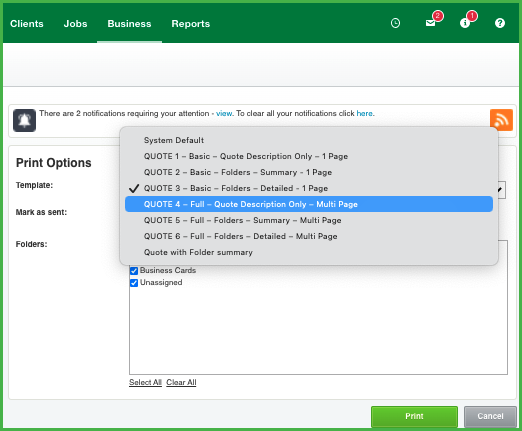
Using the new folders functionality, I can either show full project detail - all the tasks and costs for each phase of the project like below…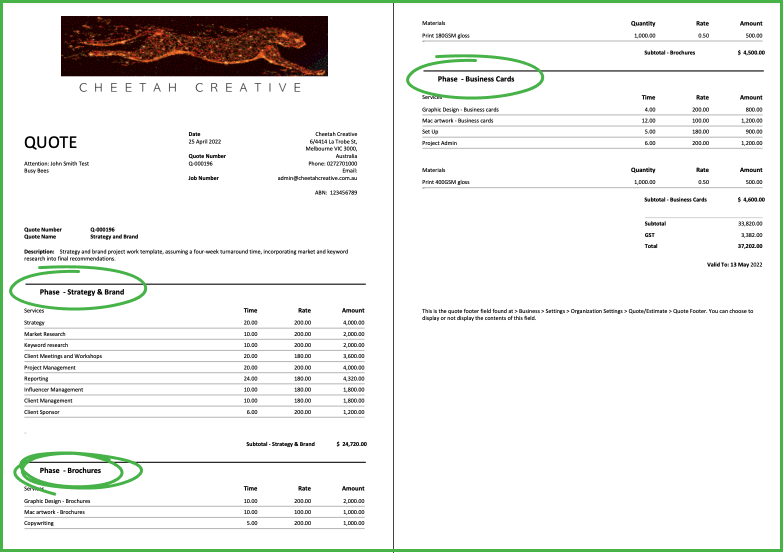
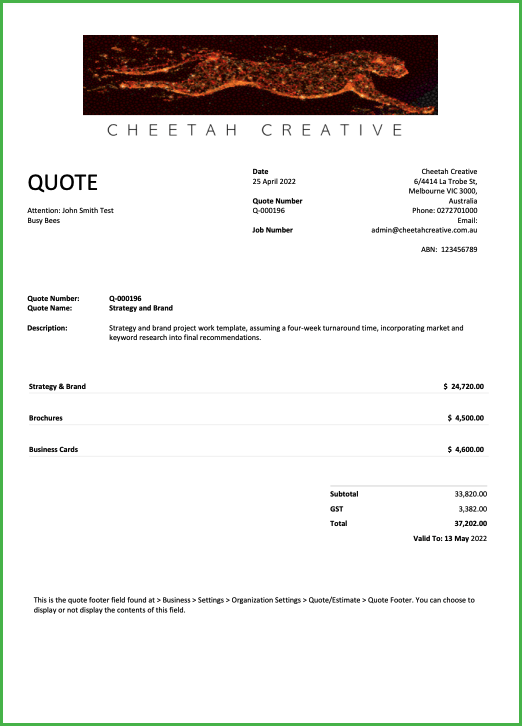
Or I can choose to just show the subtotals for each phase of the project like below. The great thing about using folders on quotes, is that it gives you so much flexibility in how you can display the information you want your clients to see.
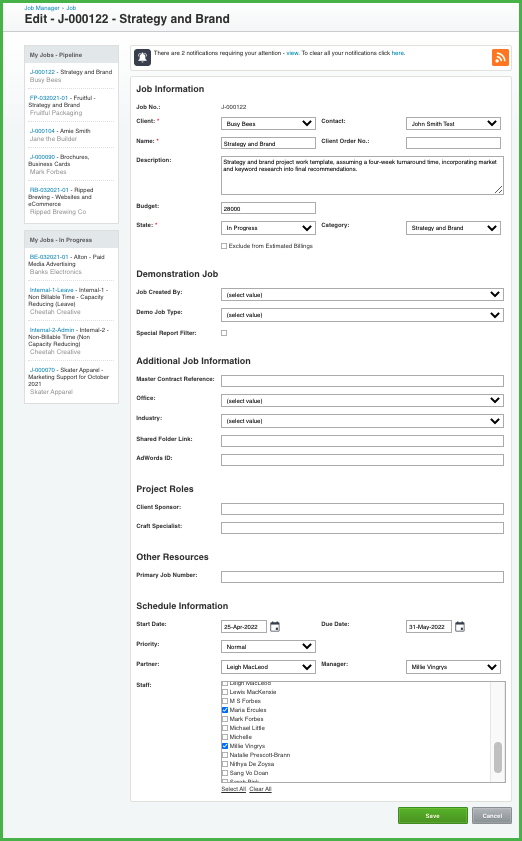
Once my client has accepted the quote - I’ll go into WorkflowMax and create the job. By hitting “accept” in the quote view, all of the information including the details in the folders (phases of the project) I’ve planned out, automatically gets pulled into the Job details.
Simply click on a folder and you’ll see all the tasks and costs associated with completing that particular phase of the project. Then allocate your team to tasks and away you go!
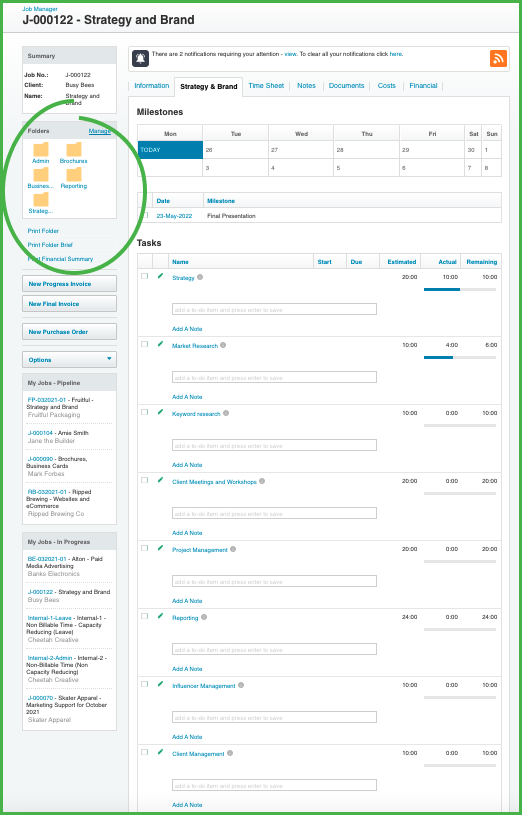
Once you’re ready to invoice for some or all of the project fee, click into the Financial tab in the job. You’ll see all your estimated billings and which phase (folder) the tasks and costs belong to. On the left hand side you’ll see a New Progress Invoice Button and New Final Invoice buttons.
Estimated billings show you what is available for invoicing right now, and can be calculated based on your quote or actual time and costs (depending on your settings).
You can see your estimated billings on the Financial tab of your job or you can print a report from the Financial tab of your job, or for all jobs, from your Reports menu. On the Financial tab of the job view you’ll now be able to view your estimated billings in the standard old format by tasks and costs, or using the job folder.
Standard estimated billings view by task and cost: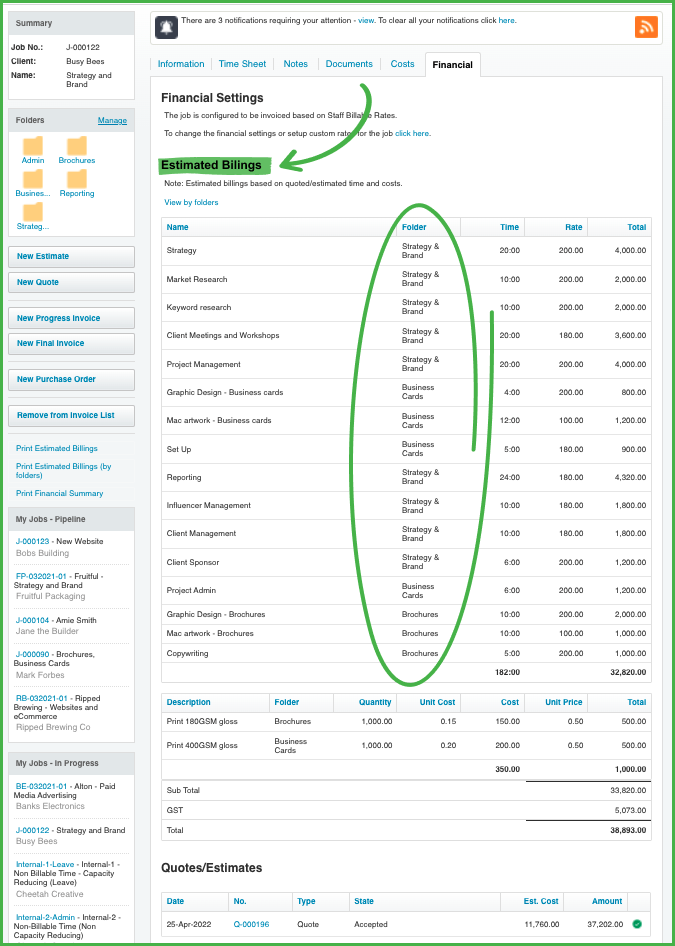
Or view by Job folder.
Now moving on to creating the invoice. This time I’ve agreed with my client to invoice for all costs upfront so I’ll create an invoice based on quoted time and costs.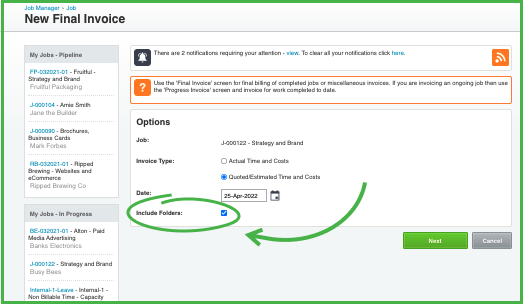
Important: There are two ways to invoice either based on actual time and costs (actual) or pulling in the quoted/estimated time and costs, and for each, you could invoice based on the calculated value, or fixed price. Selecting a fixed price will transfer all of the detail including folders from your quote onto the invoice. Then you can simply decide how much information you want to display on the invoice for your client…you can detail all of the tasks and costs you’ve completed or quoted, or you can just show the top line.
In this draft invoice I’ve created you’ll see the original folders have carried through from the quote or job to the invoice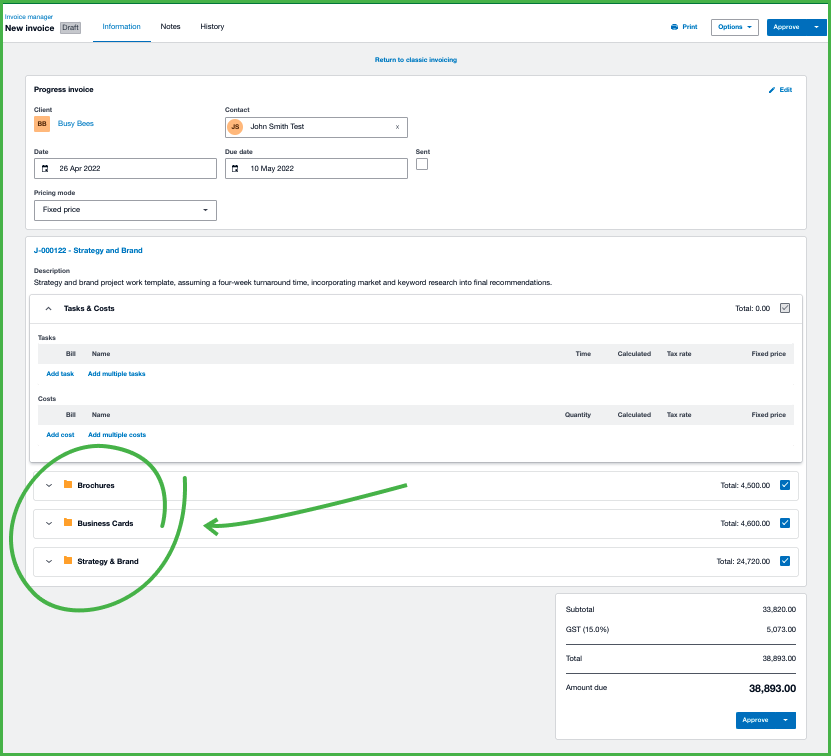 Below I can expand each folder out to show all of the tasks and costs that I am billing the client for under each phase (folder).
When printing and sending this to my client, again, I can use a custom print template that I’ve set up for my invoices to show as much or as little information as I want.
When I approve my invoice, it is automatically sent to Xero, and now I can choose to export just the folder subtotal lines, rather than all the tasks and costs or just the total job summary.
Using folders on invoices will help you be more productive and profitable
So there you have it - use the folders functionality from end to end and your invoicing process will be quicker and more accurate. You can now transfer all the information from your quotes or jobs directly onto your invoices. And, you’ll have a better view of each grouped item’s gross margin and profit percentages so you can see right down into the detail to discover just where you’re making money and what phases of your project are the most productive and profitable.
Watch the demo
