

.svg)

.svg)

.svg)


-2.svg)


Thanks for all your feedback on our roadmap. As part of our ongoing product enhancements, we’re excited to announce our first round of new invoicing features is live.
1. Import Overpayments and Prepayments from Xero against your WorkflowMax invoices
When your invoices are exported into Xero, they sit there until you apply a payment in Xero, which then imports back against your invoice in WorkflowMax.
However, if you applied a “Prepayment” or “Overpayment” type in Xero against the invoice, this type of payment wouldn’t flow back against your WorkflowMax invoice.
This meant that you’d either have to manually apply the payment twice (once in Xero, then again in WorkflowMax) or if you didn’t notice, you’d likely have a bunch of “unpaid” invoices with parts of the balances outstanding in WorkflowMax.
This latest release allows the prepayments and overpayments you’ve applied to your Xero invoice to automatically import against your WorkflowMax invoice along with payments and credit notes which have previously imported.
Import “Overpayment” and “Prepayment” payment types from Xero
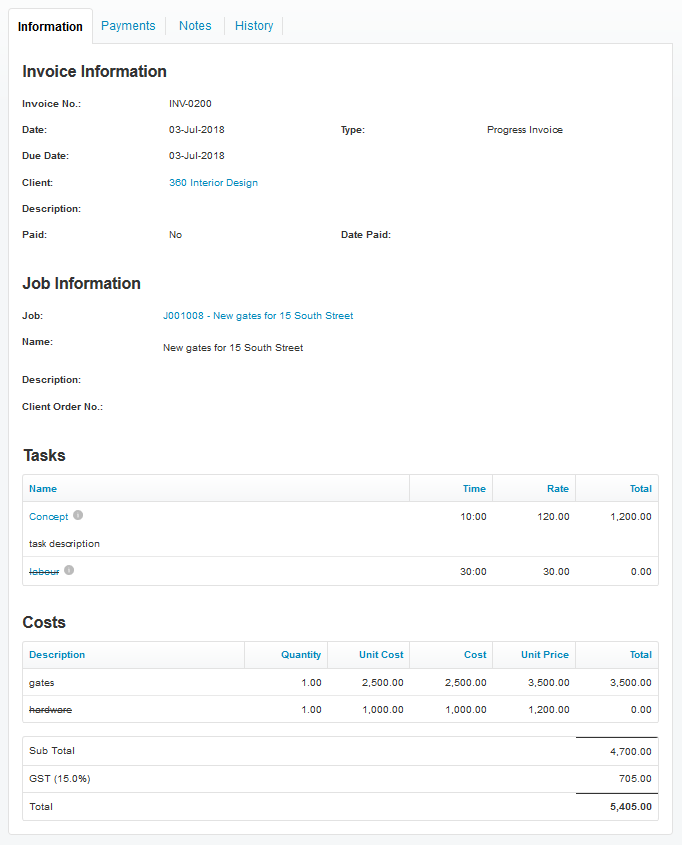
1 – Create an invoice in WFM
2 – Invoice is exported to Xero 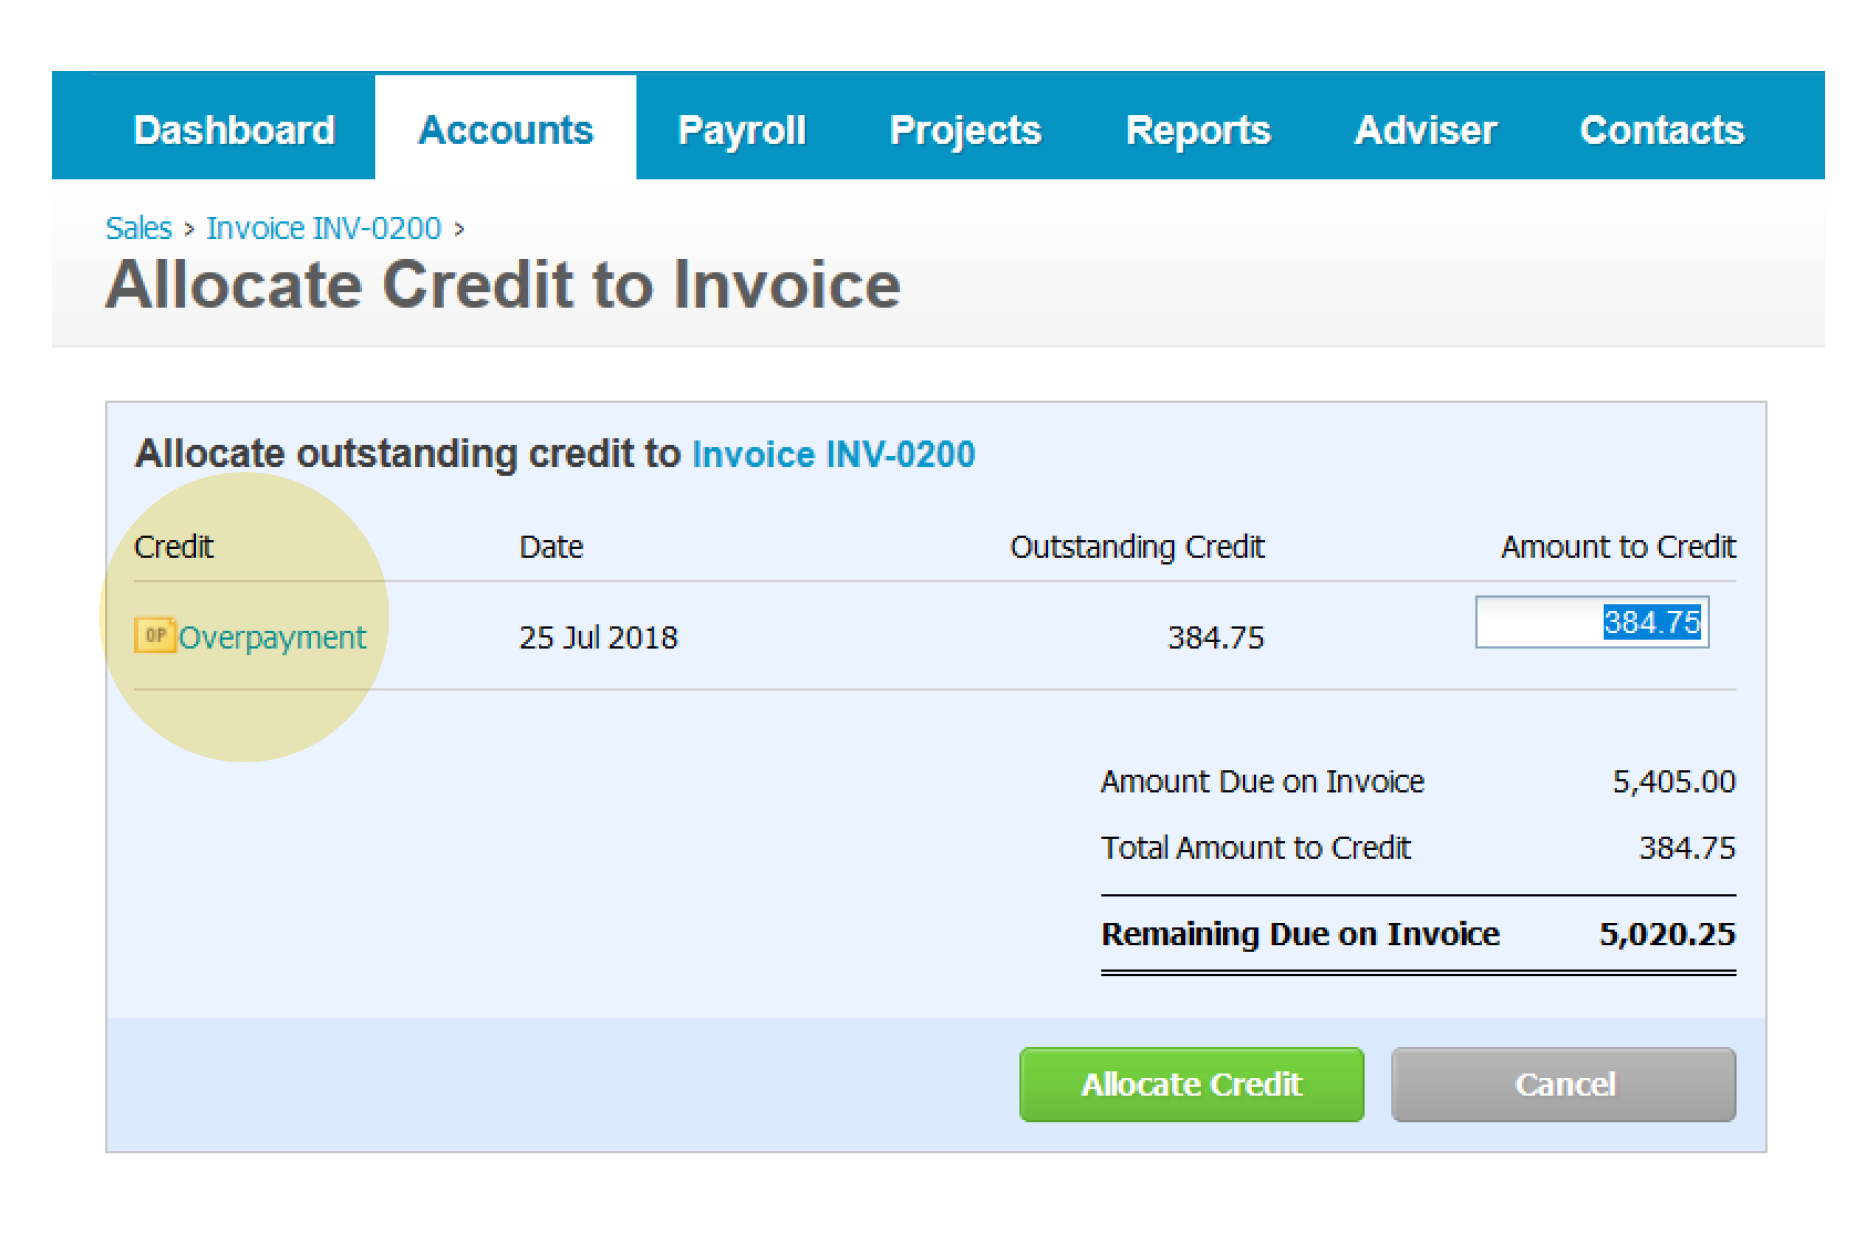
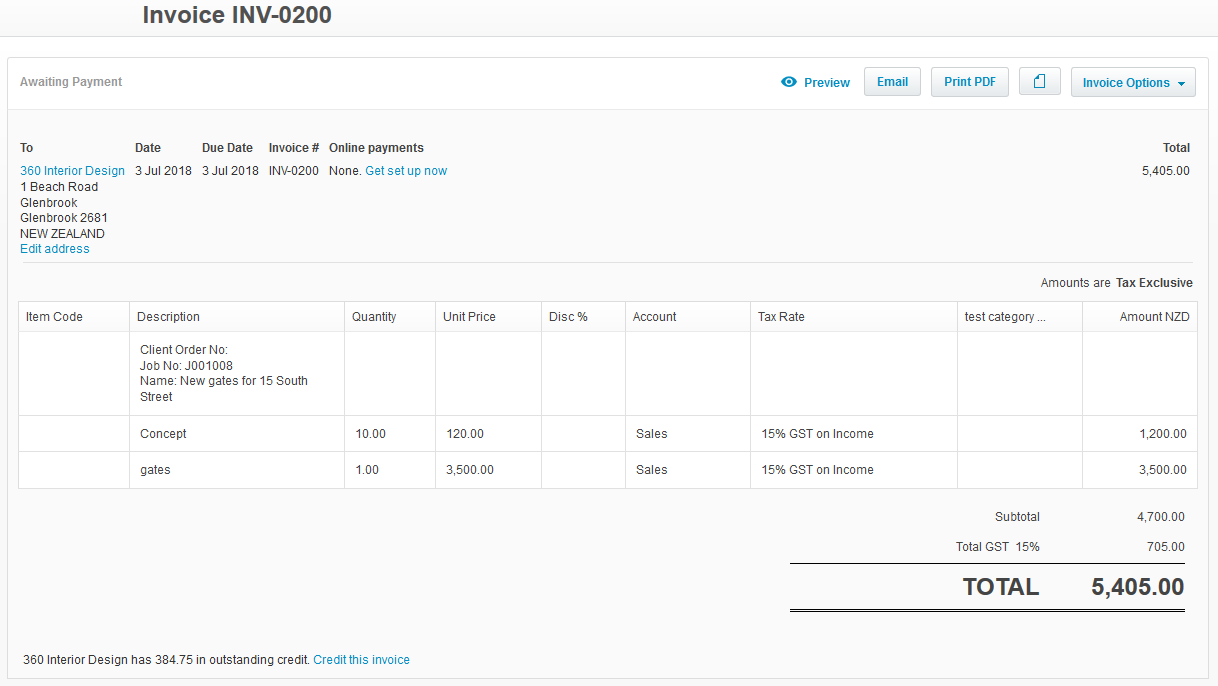
3 – Apply payments to the invoice in Xero - In this case we’re using the“Overpayment” payment type in Xero
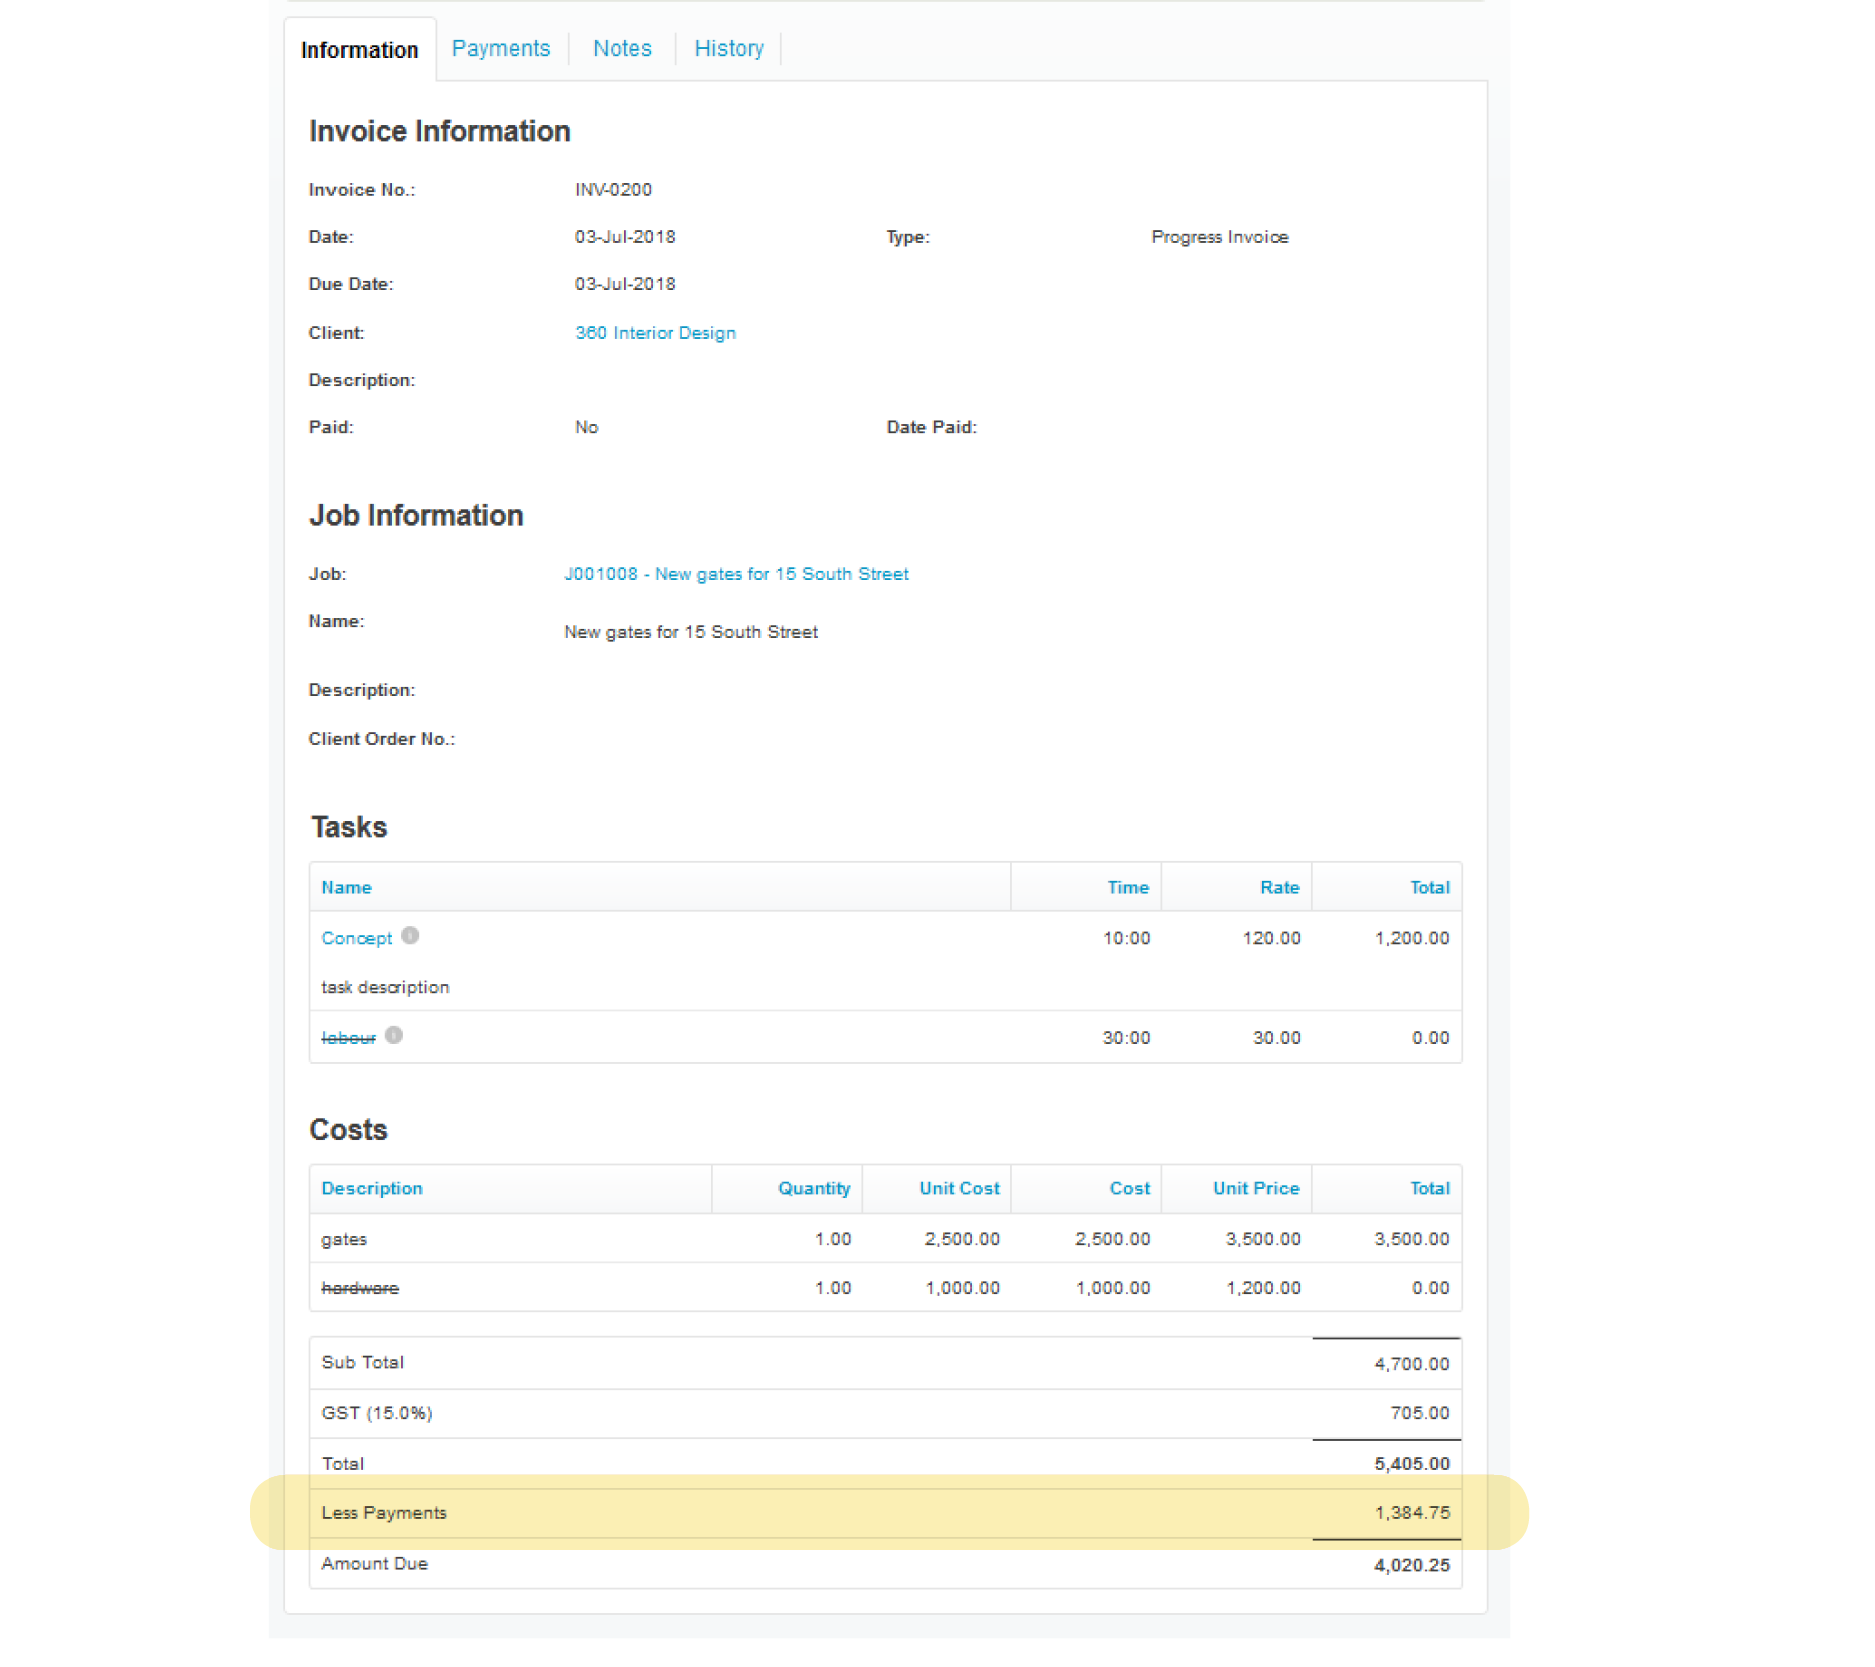
4 – When the Xero payments are imported into WorkflowMax, the payments will show as one line. The total now includes all types of payments, including in this example another payment I’ve added to this invoice since the initial overpayment.
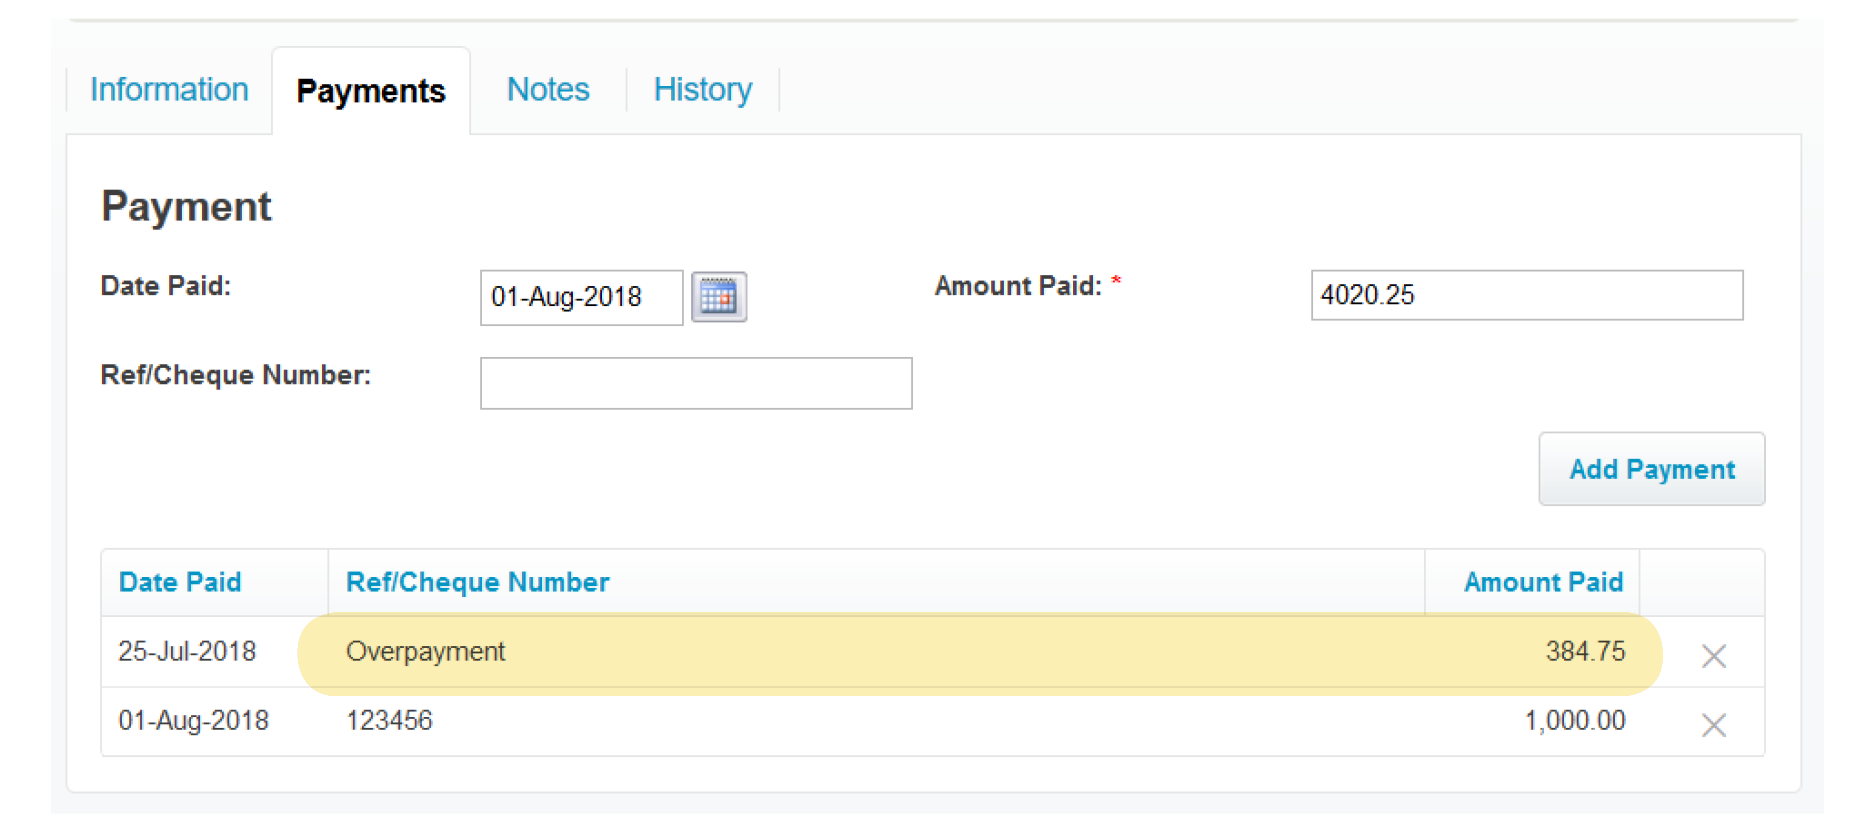
5 – If you drill down on the payments tab, then you will see each payment listed.
2. Map your invoice tasks and costs to specific Xero revenue accounts and tracking categories based on your job category in WorkflowMax
It is now possible when creating bulk invoices (multi job) to map your tasks and costs to specific Xero revenue accounts and tracking categories, by job category.
Previously you could do this for individual invoices you created for each job, it was never intended to be used with bulk invoice (multi-job invoices).
With this new release, your invoice tasks and costs will map to your specified Xero revenue accounts and tracking categories, based on the job category of the job you’re invoicing.
Map your Xero invoice lines based on the Job Category
![]()
1 – Create a Job category from - Business -> settings -> Job Settings menu, and Job Category tab.
Edit the job category and select an Income account to map all invoice tasks and costs for jobs of this type. You can also select a Xero tracking category here to be applied to all invoice lines for jobs with this job category.
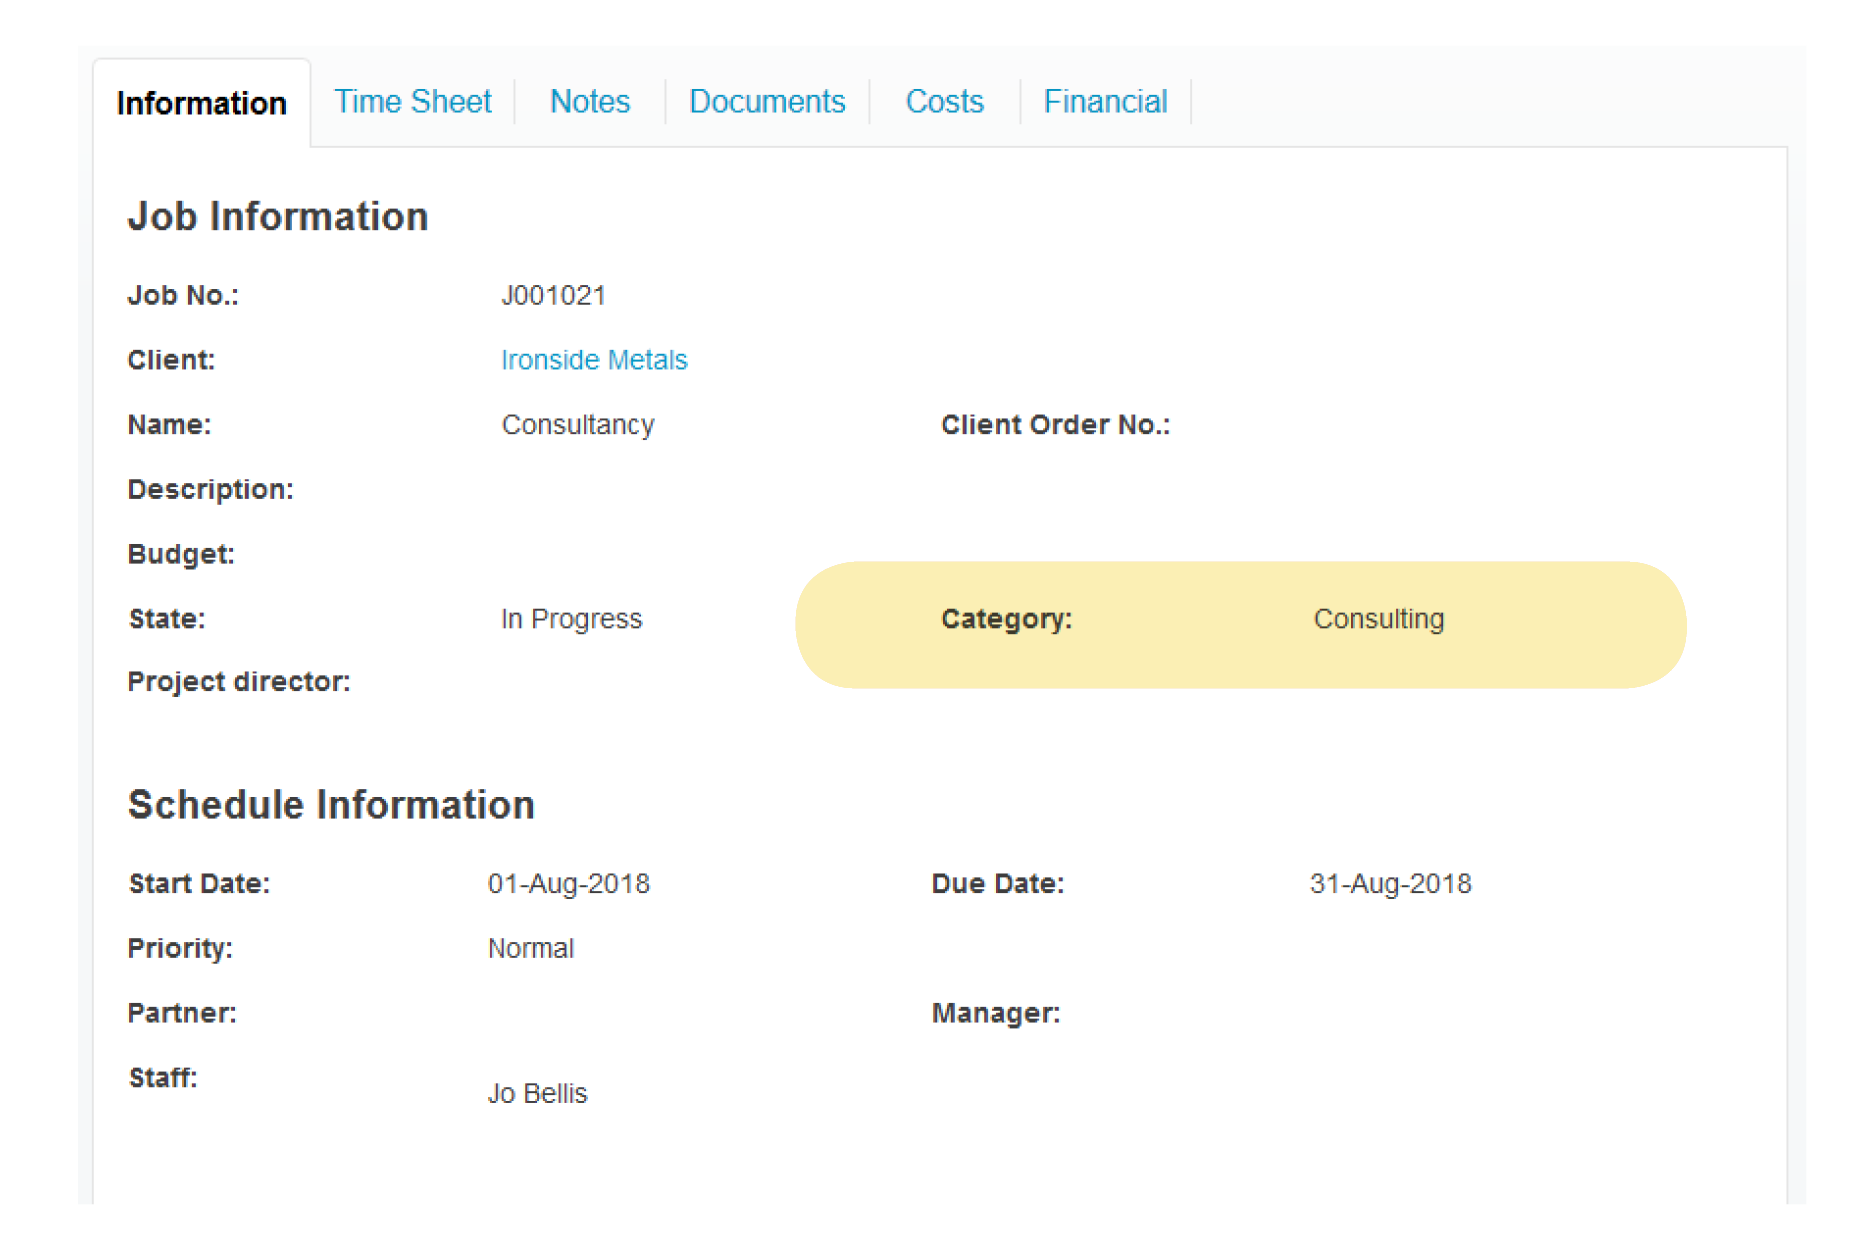
2 – Add the category to the job
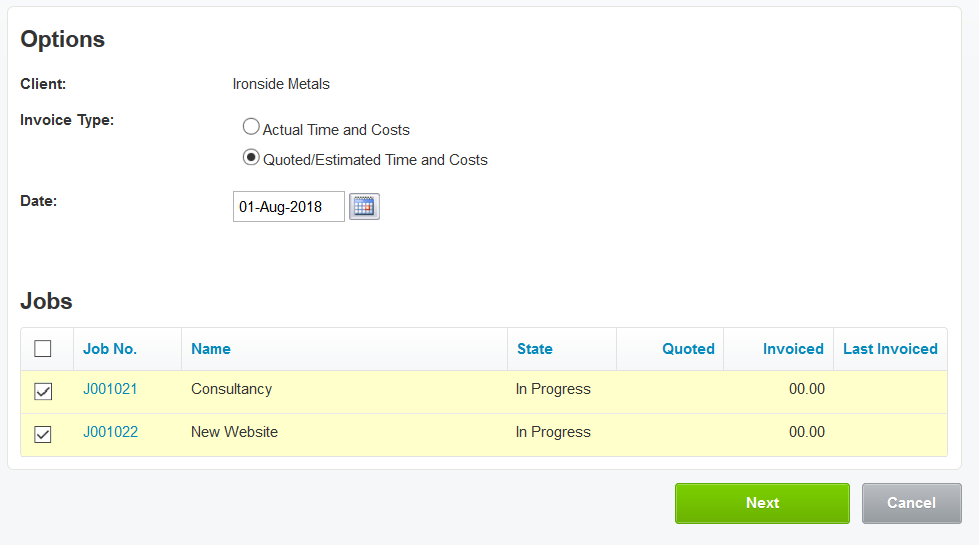
Image a - Invoice is created from Invoice Manager menu.
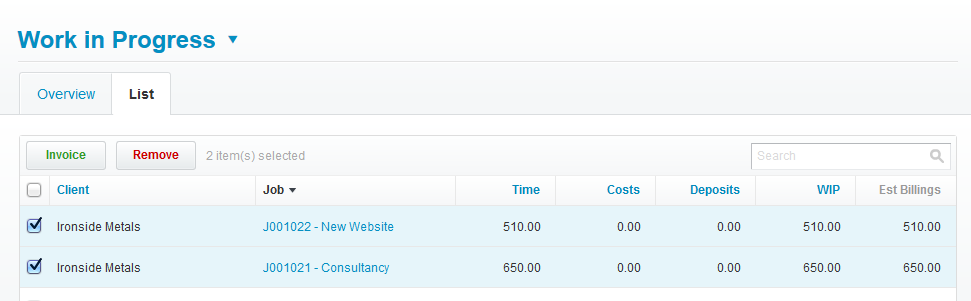
Image b - Same invoice is created from WIP Manager menu. First select the jobs to include in your invoice.
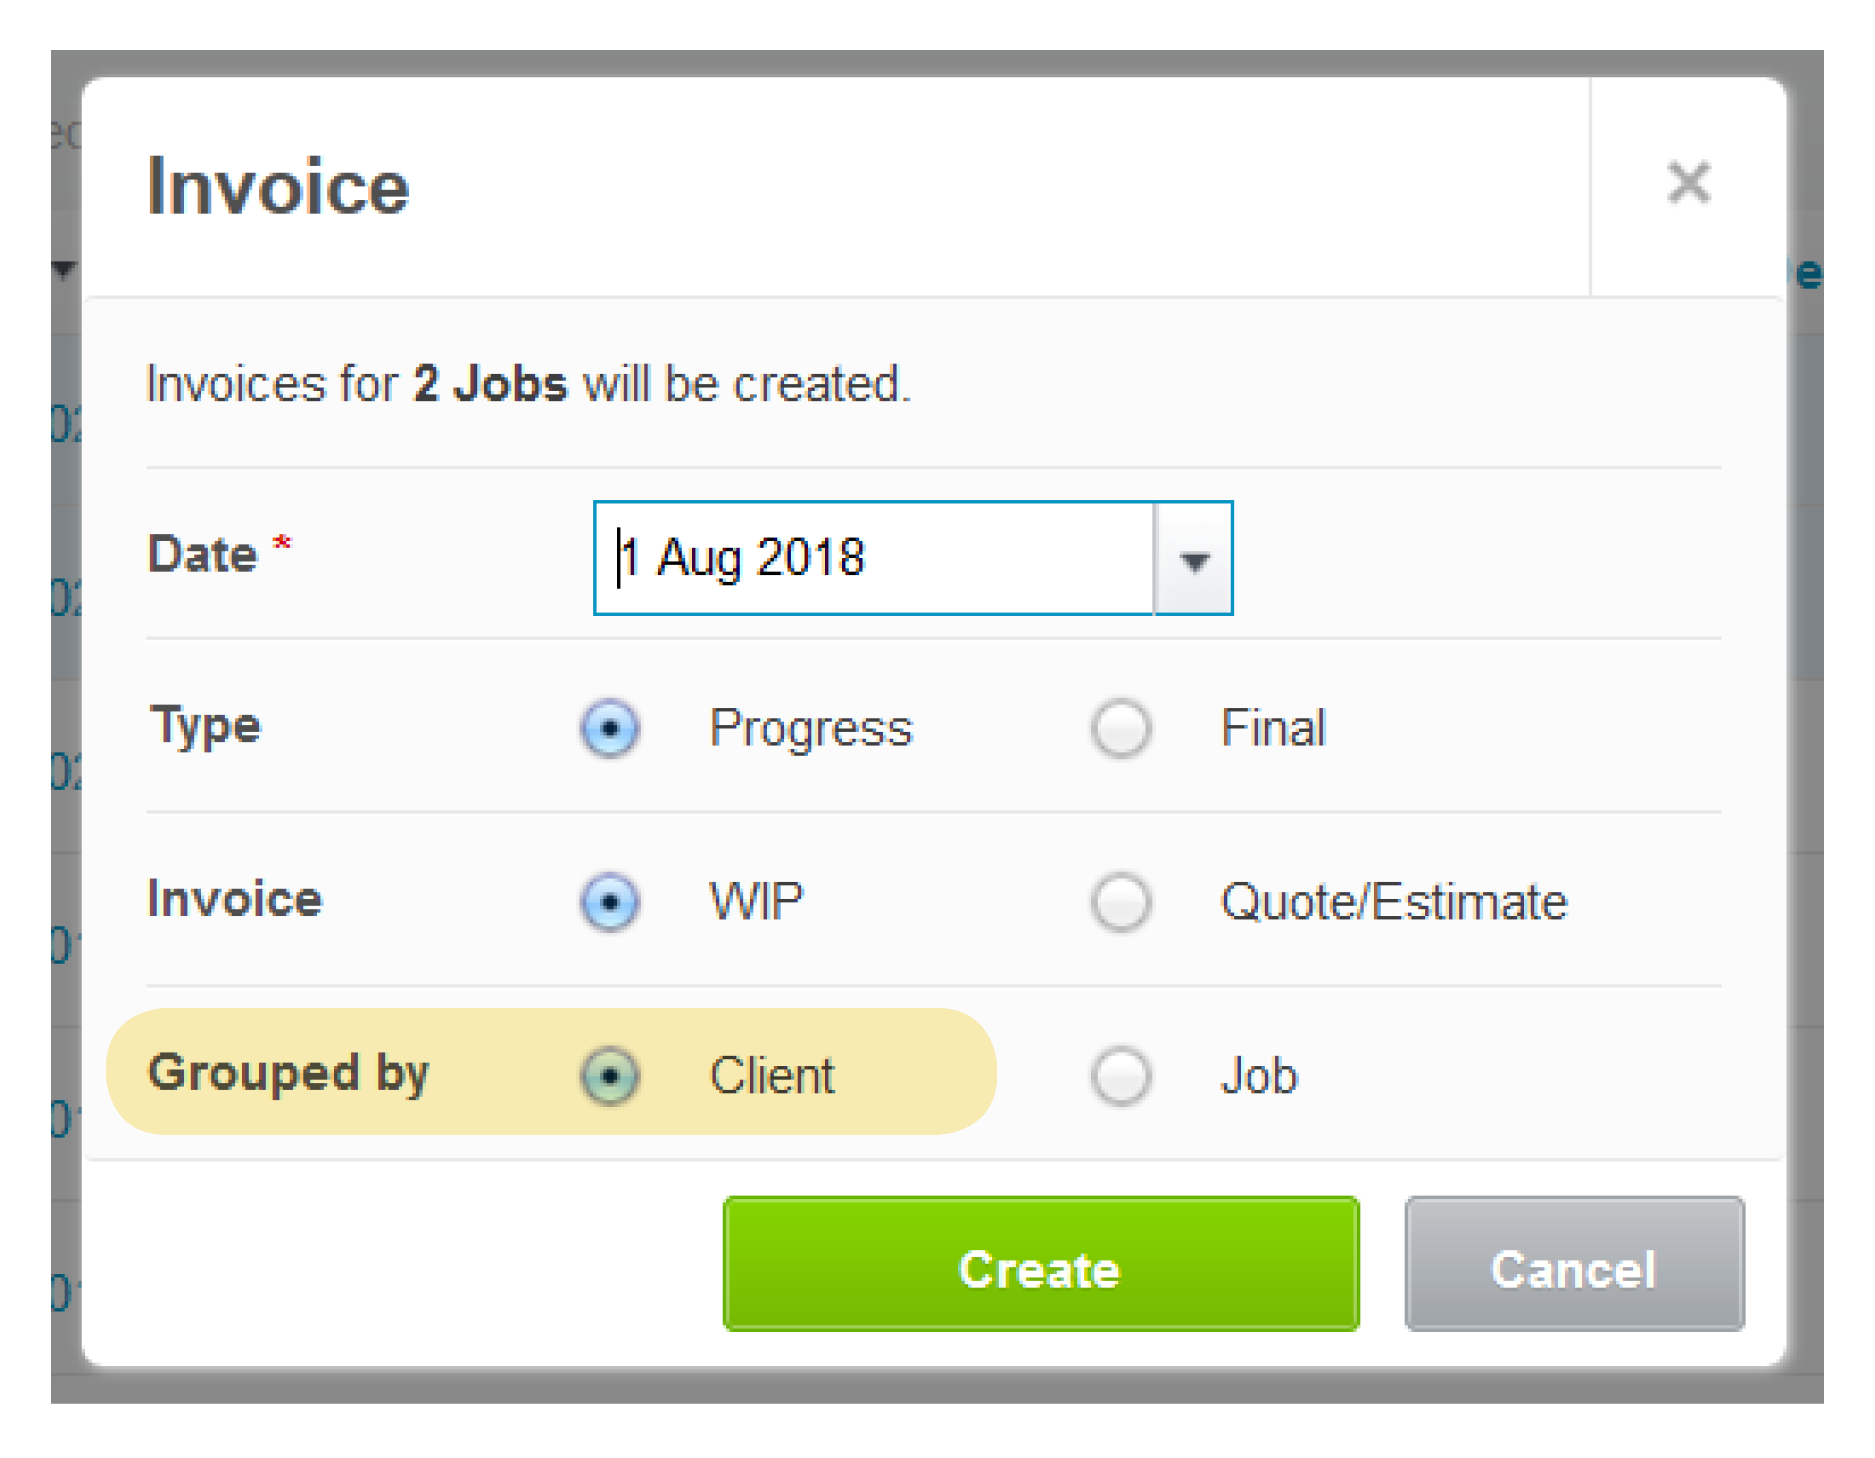
Select “grouped by client” to create a multi-job or bulk invoice by client, where you might have more than one job per client.
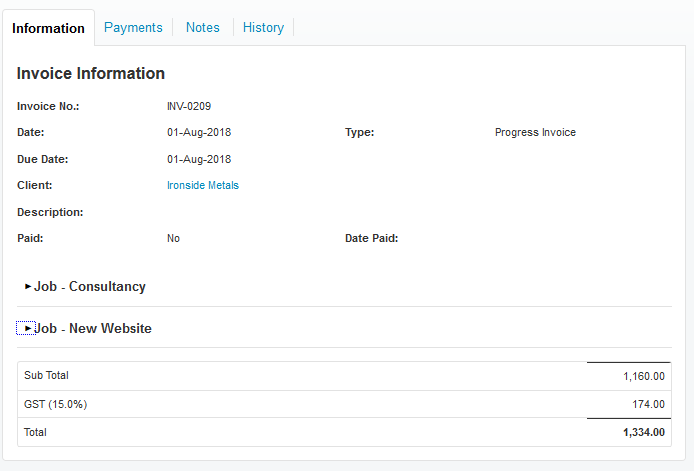
3 – This multi-job invoice shows a summary of two jobs. You can click to expand the jobs and view the tasks and costs per job.
All invoice lines created on jobs where a job category has been applied, will now be mapped to the Xero account and/or Xero tracking categories you have selected under the Job Category settings.
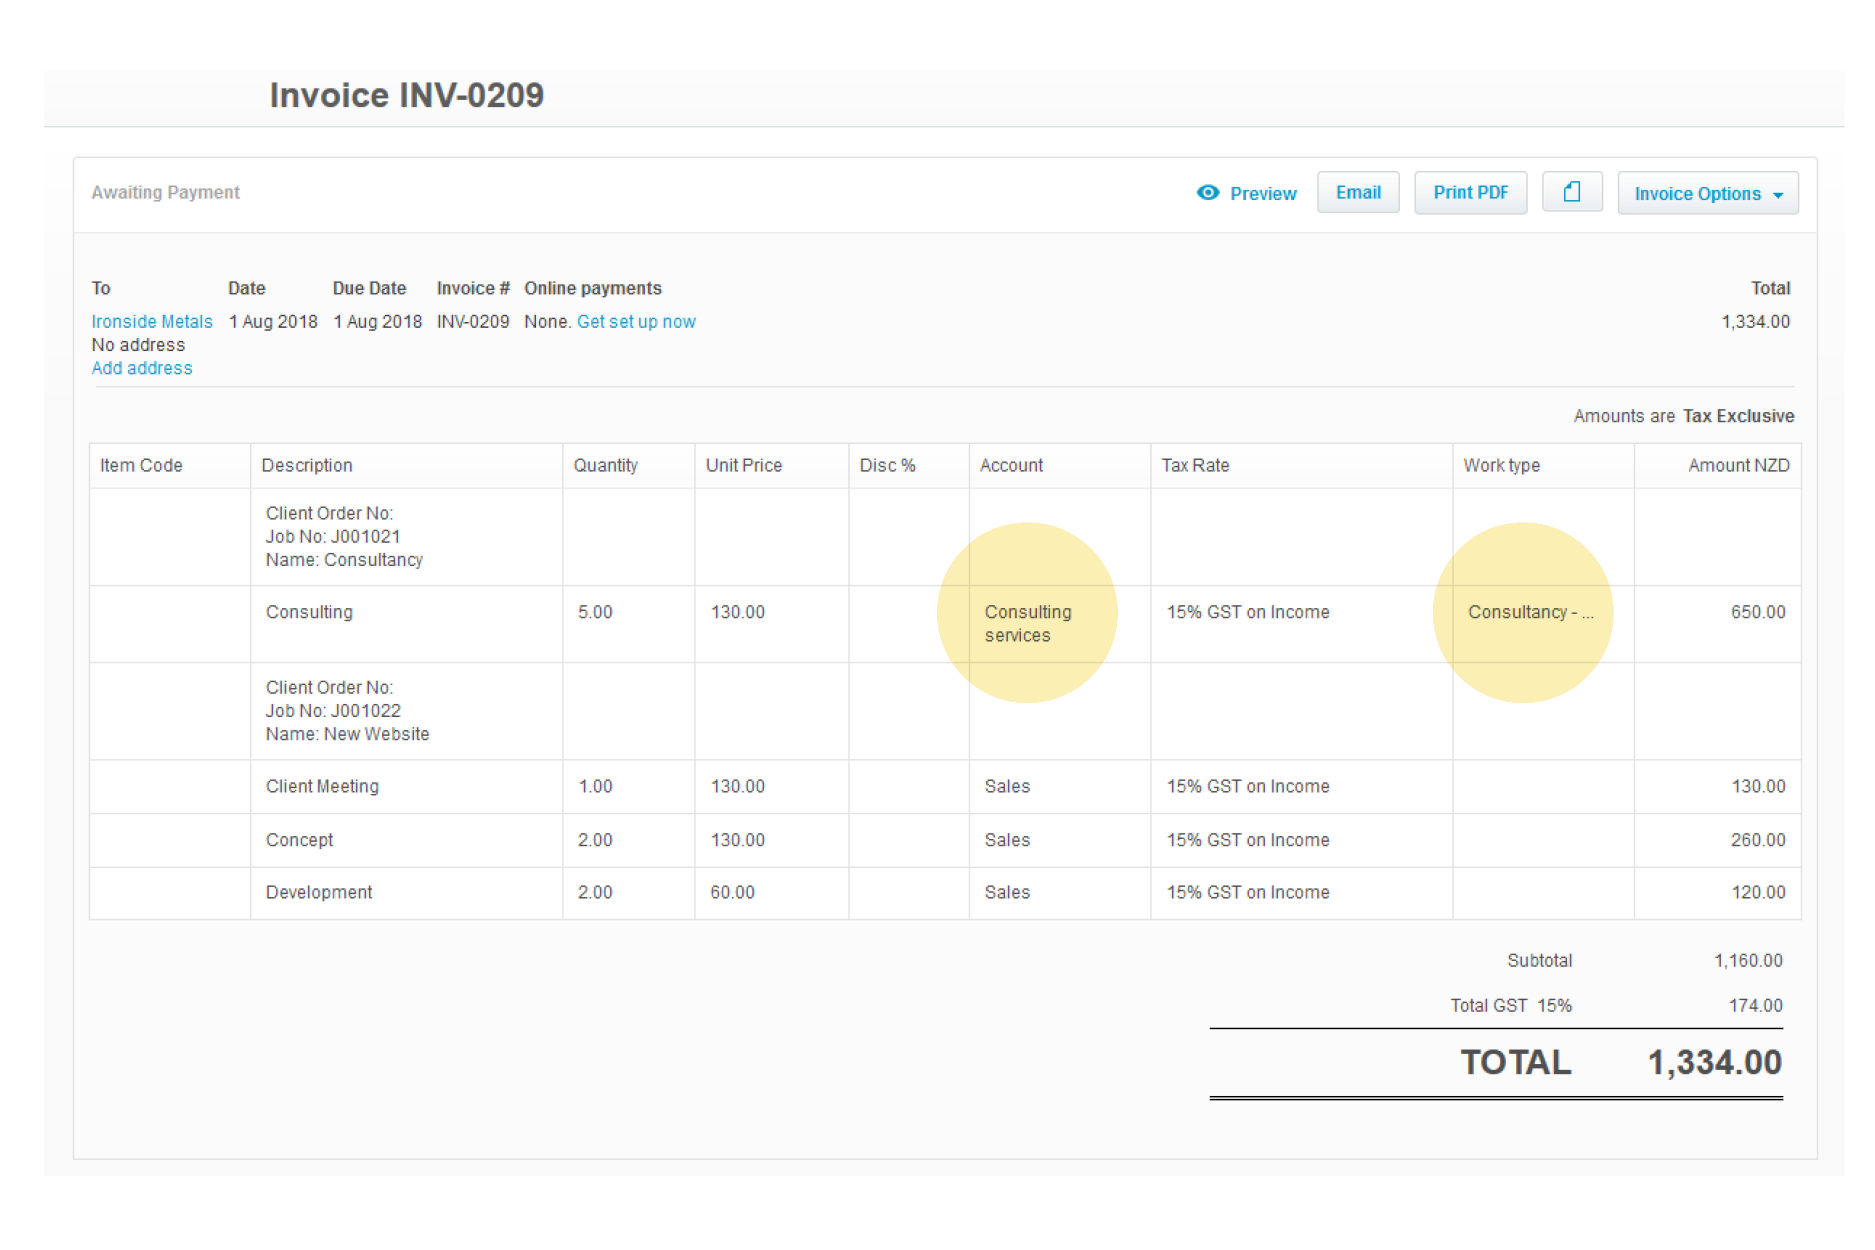
4 –Invoice in Xero - J001021 mapped to “consulting services” as per job category set up. J001022 mapped to the default “sales” account, as this job has no job category applied.
Visit our support centre for more information on the Xero Interface
**
We’ve also got a few more enhancements coming to invoicing soon, so stay tuned on the blog and as always, we welcome your feedback in the comments section below.