
.svg)

.svg)

.svg)


-2.svg)


As an agency, you know that acquiring new clients takes a lot of prep work.
There’s the research, the calls, the emails, the planning, and not to mention the time that it takes to actually put together the job quote.
While we can’t remove the discovery and research process of obtaining new clients, WorkflowMax can help you simplify the quote development. This once dreaded, time-consuming process is actually not as painful as it used to be. With WorkflowMax, drafting and delivering a quote can be done with ease, and with a click of button (if you've set yourself up correctly).
Below, we’ve outlined the simple steps required to create a quote within WorkflowMax, so you can see how seamless it truly is.
Editor's note: This blog post was updated from its original version on 21 May 2020.
1. Create a Quote
In WorkflowMax you have the option to create quotes and estimates. The only difference between the two is the name, as some of our clients prefer to send quotes and others prefer estimates. Both are set up the exact same way.
Within WorkflowMax, you can create quotes by scrolling over the “Business” tab at the top of the header, and selecting quotes or if you're in the Quote manager then hover over new and select Estimate or Quote.
2. Input All the Quote Details
Once the quote information window opens, you will be prompted to input specific details of the quote, including the client, client contact, a description of the quote, budget details and dates in which the quote is valid. When finished, hit “Next.” (Note: You have the option to select which template you would like to use. Within WorkflowMax, you can customize your quote template with your company logo and colors).
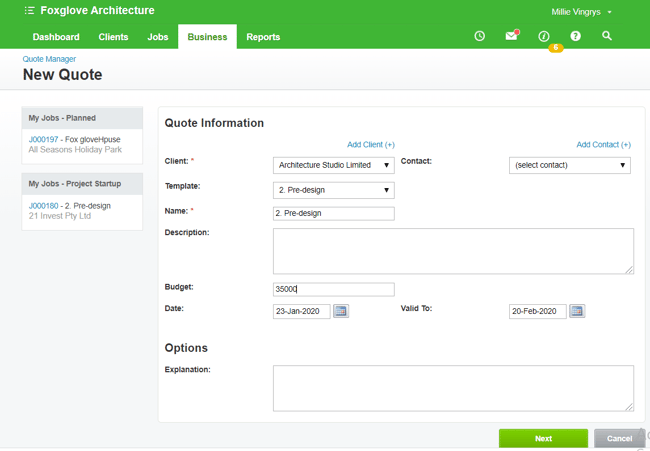
If you are sending a quote to a new client or prospect, click “Add Client” above the client field, and insert the required general information. When done, hit “Save.”
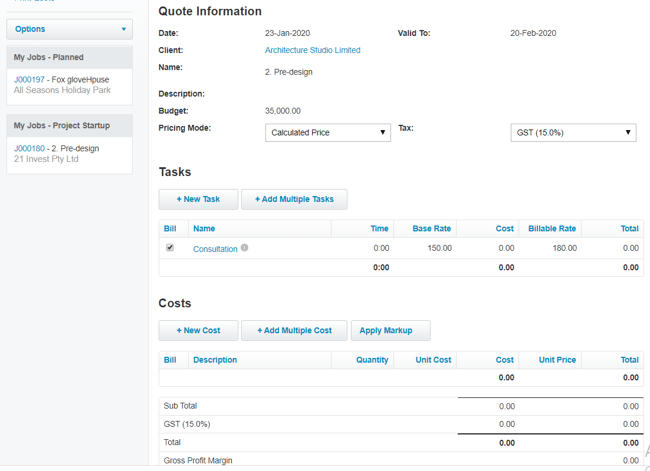
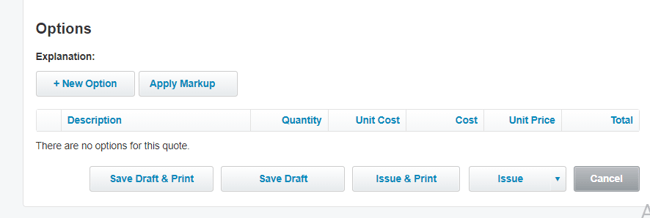
3. Add Associated Tasks, Costs and Markup
Once you’ve filled out the quote information, you can begin inputting tasks and associated costs to complete the quote.
- To add a task, simply select, “New Task” or “Add Multiple Tasks.”
- To add a cost, simply select, “New Cost” or “Add Multiple Costs.”
- To add a percentage markup, select “Apply Markup” and adjust the percentage accordingly.
4. Finalize and Send
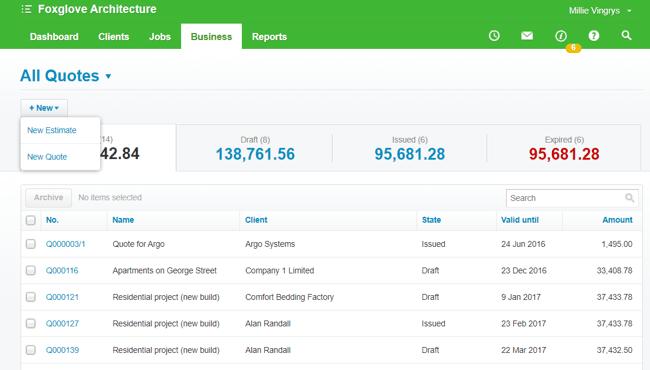
When you’ve finished inputting the details of the quote, save it as a draft. To review the draft prior to finalising and sending the quote, go to the Quote Manager section of your WorkflowMax account. This can be found by scrolling over the “Business” tab at the top of the header, and selecting “Quotes” from the dropdown menu.
If you are satisfied with the appearance of the quote, hit “Issue & Print” to create a PDF that you can email, or print and mail to your client or prospect.
That's it! You're done - You can now send beautiful quotes like this one in minutes:

5. Update Quote Status
Finally, you can update the status of the quote—Revise, Accepted or Declined—based on the prospect’s response.
- Revise: If you need to make changes to the quote after you’ve hit “Issue,” click “Revise,” then resave the document.
- Accepted: If the recipient accepts your proposal, click “Accepted” from the quote screen. As soon as “Accepted” is clicked, WorkflowMax automatically creates the quote as a job within your account, complete with all associated quote details, including: client, description, projects and costs.
- Declined: If the recipient rejects your proposal, select “Declined.” WorkflowMax will delete this quote from your Quote Manager.
For more information on how to develop quotes, check out the full demonstration video here.
Subscribe to our newsletter to get tips and best practices for improving business operations, streamlining project management and much, much more!